
Whats is SDN (Software Defined Networking)? well, thats question will create many opinion and statement from many vendor, website, consultant and other organization, from website opennetworking.org i quote “Software-Defined Networking (SDN) is an emerging architecture that is dynamic, manageable, cost-effective, and adaptable, making it ideal for the high-bandwidth, dynamic nature of today’s applications. This architecture decouples the network control and forwarding functions, enabling the network control to become directly programmable and the underlying infrastructure to be abstracted for applications and network services. The OpenFlow® protocol is a foundational element for building SDN solutions.”
Whats is the goal of SDN? from sdxcentral.com I was quote “The goal of Software Defined Networking is to enable cloud and network engineers and administrators to respond quickly to changing business requirements via a centralized control console”
From my own opinion, SDN is a way how we (Network Admin or Engineer) facing the speed of bussines development especially in digital bussines that used software application or software service as a core bussines to their customer or marketplace, this bussines model usually have rapid growing bussines, dynamic, and need fast improvement with new innovation to their product, because on this digital era this model business it’s so promises, and the competition its very tight, software was developed everyday, every device connected to the internet, innovation was come and produce as a software product to solve human problem, make bussines requirement growing fast and pushing traditional networks to the limit ,in addition how we manage network look so slow.
SDN Benefit??
- Directly Prorgrammable : enables the network to be programmatically configured by proprietary or open source automation tools, including OpenStack, Puppet, Ansible, Python Script and Chef (yes all about automation and agile)
- Reduce Opex : yes, because with directly programmable, we can automate provisioning, configuration, and orchrestation
- Agility : Sure, Abstracting control from forwarding lets administrators dynamically adjust network-wide traffic flow to meet changing needs, (we can totally control the flow)
- Centrally managed : its make we easier to management our network infrastructure then we must remote node by node and do manual config
SDN Architecture??
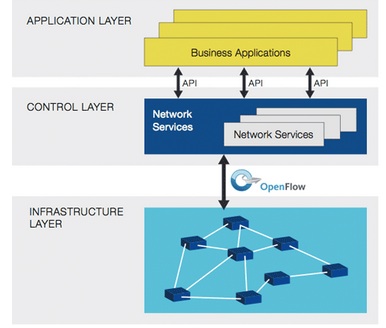
Like on the picture above, Commonly SDN Architecture have 3 Layer:
1. Application Layer
On this layer there Northbound APIs: Software-Defined Networking uses northbound APIs to communicates with the applications and business logic “above.” These help network administrators to programmatically shape traffic and deploy services.
On the application layer, it can be orchestrator system infrastructure ,automation tools, Or Python Script
2. Controll Layer
This layer is “brains” of the network, SDN Controllers offer a centralized view of the overall network, and enable network administrators to dictate to the underlying systems (like switches and routers) how the forwarding plane should handle network traffic.
3. Infrastructure Layer
on infrastructure layer there Southbound APIs: Software-defined networking uses southbound APIs to relay information to the switches and routers “below.” OpenFlow, considered the first standard in SDN, was the original southbound API and remains as one of the most common protocols.
On this article we will do some lab environment to know more aboute concept of Software defined network used “Mininet”, what is mininet?? Mininet is a network emulator which creates a network of virtual hosts, switches, controllers, and links. Mininet hosts run standard Linux network software, and its switches support OpenFlow for highly flexible custom routing and Software-Defined Networking. To know more information you can visit their website on http://mininet.org/overview/.
On this experiment I installed mininet on my linux Ubuntu 14.04 64 Bit, this installation is quietly easy, I used 2 Core, 40 Gb disk and 4 Gb RAM on my Virtualization. Actually you can just download the virtual edition on their website
https://github.com/mininet/mininet/wiki/Mininet-VM-Images
but sometimes too easy make you lazy (lol) so I choose installed the mininet manually to my linux Ubuntu system
How to install Mininet??
To Install mininet on your linux system used command:
#sudo apt-get update
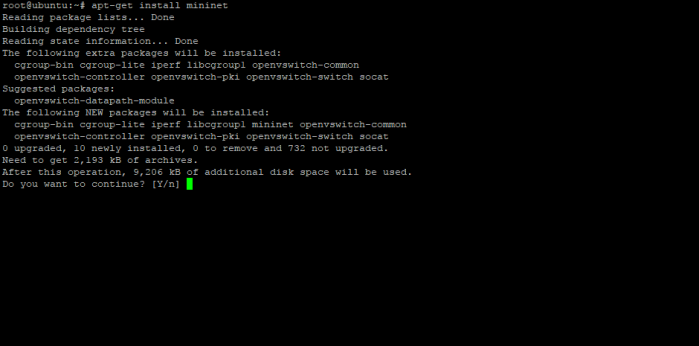
# sudo apt-get install mininet
Do clean instalation of mininet with command
# sudo mn -c
Install Git to download mininet from Git source code management
# sudo apt-get install git
Download Mininet Dependency from git Source code management
#git clone git://github.com/mininet/mininet


Change to directory mininet
#cd mininet
Tag release point of mininet with command
#git tag
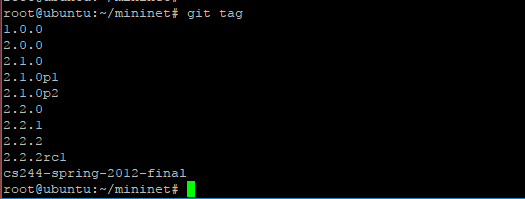
choose package release you want to install, i choose latest release
#git checkout -b cs244-spring-2012-final
install mininet
#/mininet/util/install.sh –a
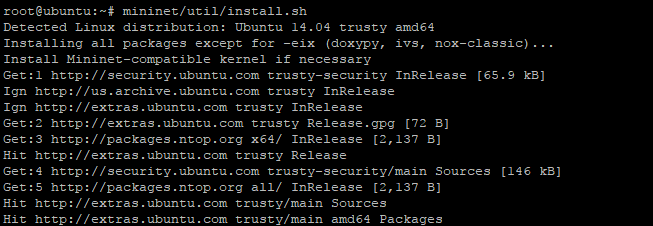
installation may take a few minutes, because they will donwload all dependency package from internet repository, and when it done ,will show like on the picture below
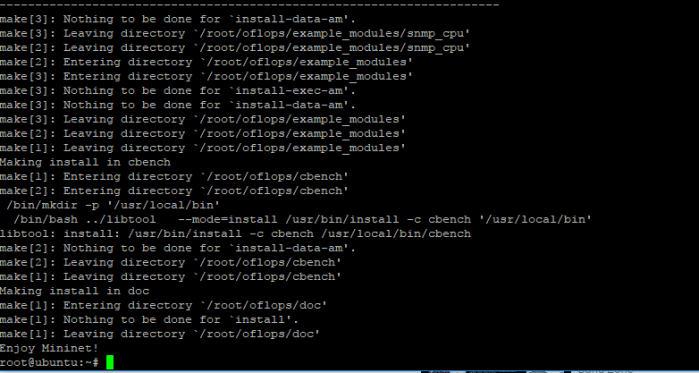
Well done, you success install the mininet to your system, easy right,,so dont be lazy la… 😛
Now run the mininet emulator with command
#sudo mn
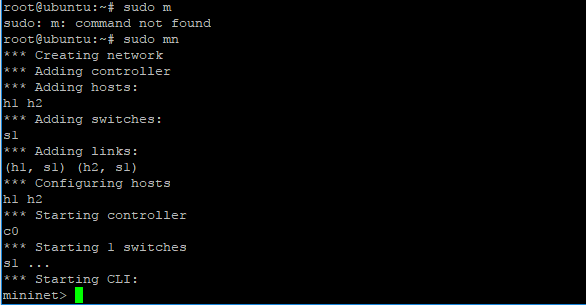
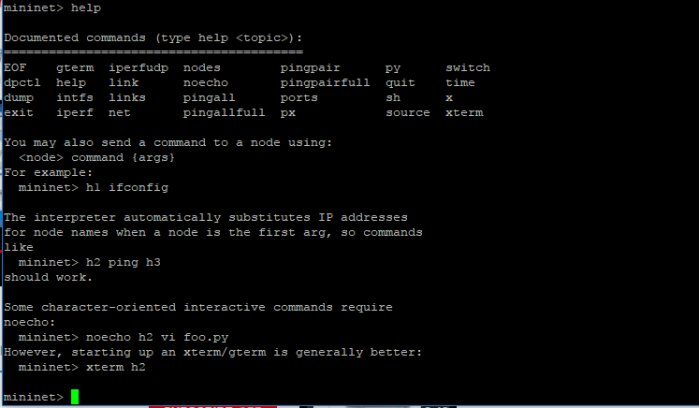
when we start mininet emulator automaticly mininet will give you a topology with 2 Host, one SDN controller, and one OpenvSwitch, then we will see the mininet command line “mininet>” act like terminal on SDN controller to show and configure all of node in the mininet topology, to know basic command on mininet terminal we can do help comamnd “mininet>help”
because this is command line base, maybe its hard to we understand how our topology looks like, so we can used some command to figure out mininet topology and understand how they connected
To see topology connection used command
Mininet>net
To see Node available on topology used command
Mininet>nodes
To see links available to interconnect all nodes on topology mininet used command
Mininet>links
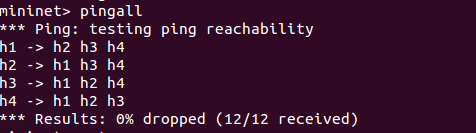
To test ping host on default mininet topology you can used command
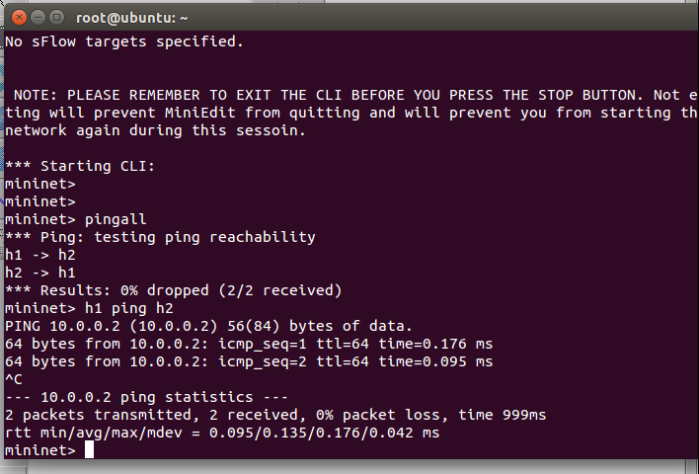
mininet>pingall
or to be specific
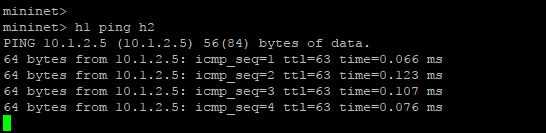
mininet>h1 ping h2
to create topology network on mininet used template you cand used command
local controller : #sudo mn –topo tree,2
remote controller : #sudo mn –topo tree,2 –controller remote,ip=<ip remote controller>
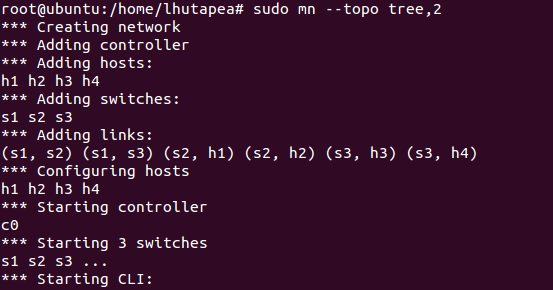
it will automaticly give you a topology network with all link, switch, nodes, and SDN controller
actually you dont worry about this command line interface, maybe you have phobia with command line interface and totally not prever used command line interface to see link connection or your topology network, mininet can integrated with other platform like OpenDaylight to act as remote controller SDN and as web base graphical interface to generate your topologi SDN network into topologi network picture, but actually mininet self have “miniedit”, thats tools will help you to design your network topologi based on topologi network picture, to open miniedit you can used comamnd

and you will shown GUI to design your topologi network like on the picture below
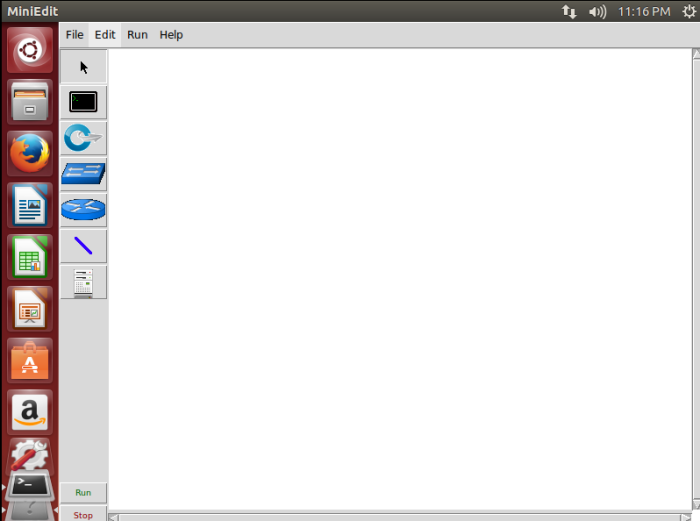
to design your topologi, its pretty simple, you just click component available on the left corner such Switch, Router, Controller, Link, host and click it to white page, then i try to create simple design of my network topology like on the picture below
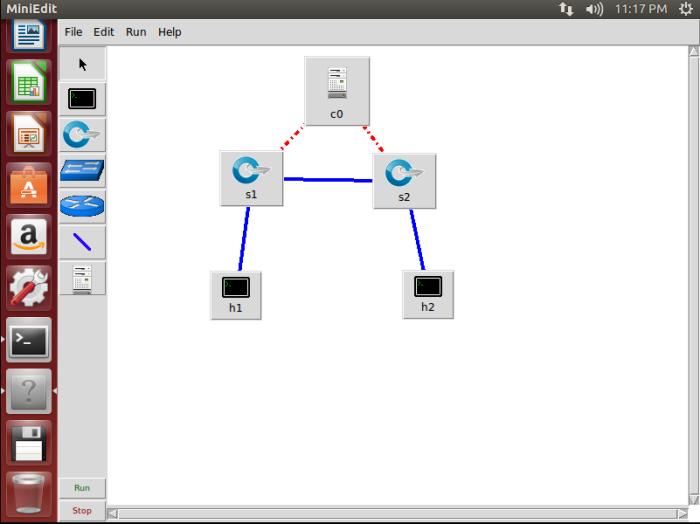
you can save your topology into mininet file with format “.mn” or generate that topology into python script through menu file –> l2 Script
next, how we can start it, and how we controll and configuration our node on thats topologi, well like i said to you before mininet used “mininet terminal” to do configuration on all nodes on topology, to show configuration, and do test connection of all node, to start mininet command line after we used miniedit, first we go to menu edit –> preferences, and do enable checklist on checkbox “Start CLI” like on the picture below

click OK and click Run button to start your emolator, then go to your terminal linux where you start miniedit, and you will see mininet terminal was available to you do some configuration on your node in the topology network
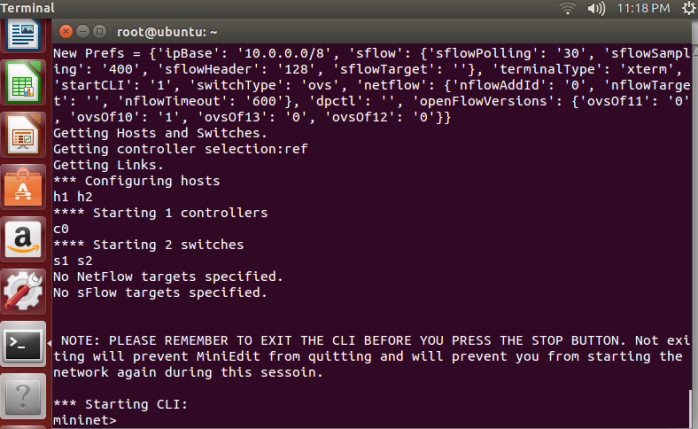
because this is simple topology and all network connected through L2, network on both of host is one segment and we have attached controller to both of OpenvSwitch, we will able do ping h1 to h2 with command “pingall” or “h1 ping h2”
Note : one thing was i get from this miniedit example is, when i created a network topology, example like on the topology miniedit before with 2 switch, two host with same connection network, but without controller connected to both of switch, i cant do test connection ping h1 to h2 and vise versa, either when i changed used one switch and 2 of host connected on one switch, the result of ping test on h1 to h2 is always timeout, then i realize, well, this is the SDN Concept, on legacy network it should be work, but in the SDN environment, even its was a switch, h1 that couldn’t be connect to h2 through a L2 device when that device not connected to the controller
Next, we will do what SDN should be can do, what is that?? yes, we will do some automation on our SDN environment, we will do direct programming to the controller through their API from application layer then controller will generate the configuration and pushed that configuration through OpenFlow to Infrastrcuture Layer, and on this test i will used python script on application layer to defined my network infrastructure
Lets create script used Python ptogramming, why python? because its simple, its multiplatform, its powerfull to do that, and why u ask? find by tourself, learn, because this program language will be popular to automate your infrastructure (Infrastructure as Code) yo know (lol)
Create Code with Vim editor
#vim sample.py
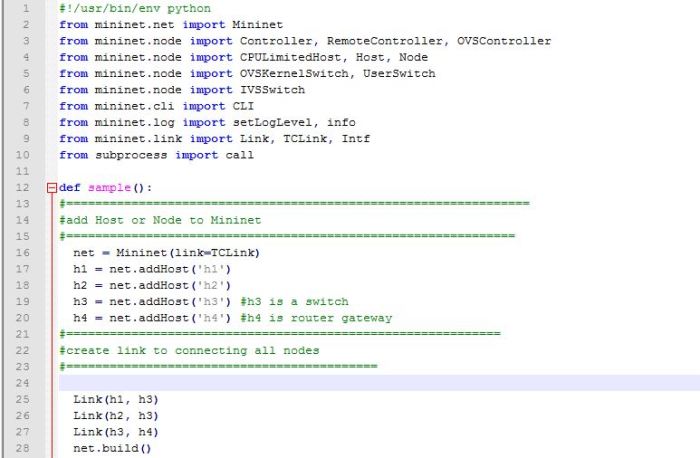
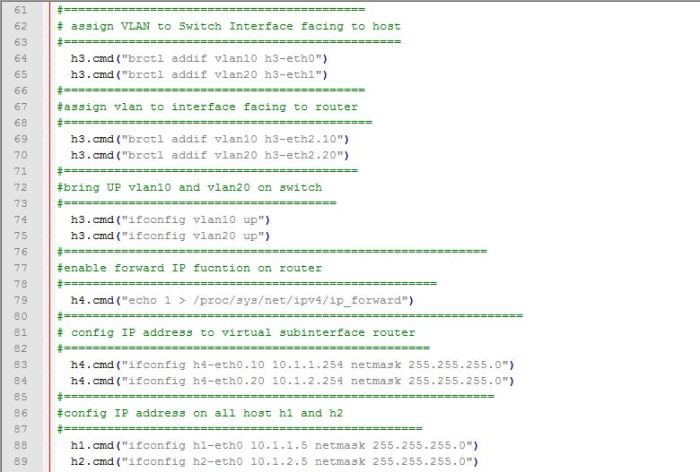
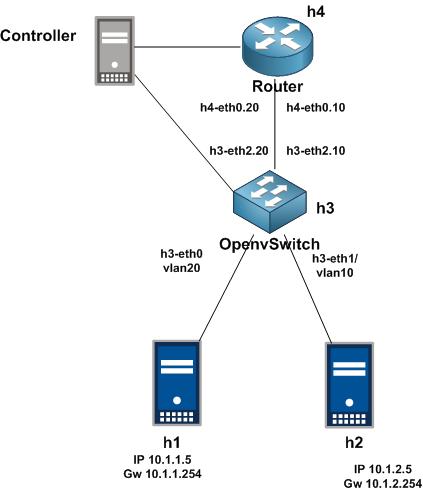
from code above i will create simple network case inter-VLAN with topology like on the picture below
save that python script and change code file to execute permission with command
#chmod 777 sample.py
and execute code program python to defined your network infrastructure with command
#python sample.py

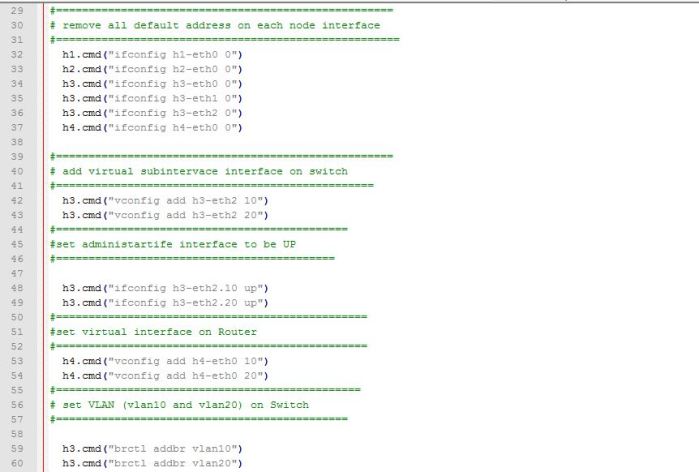
well, with execute that python code program, we have create Inter-VLAN network infrastructure with one router, one switch, 2 VLAN, and 2 Host, thats pretty simple right?
yeah its will help us, it will simplify your work, make your network more agile, efficient, and its technology pretty good enough. so next we will check node connection from network environment we just created used python script
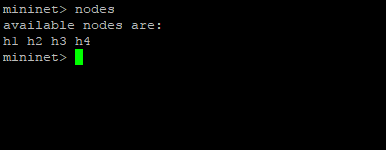
check nodes we created
check the network connection topology
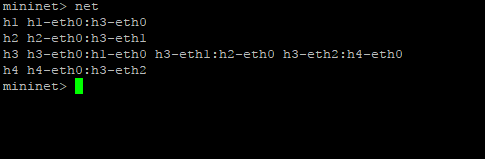
Check the network interface address of host “h1”
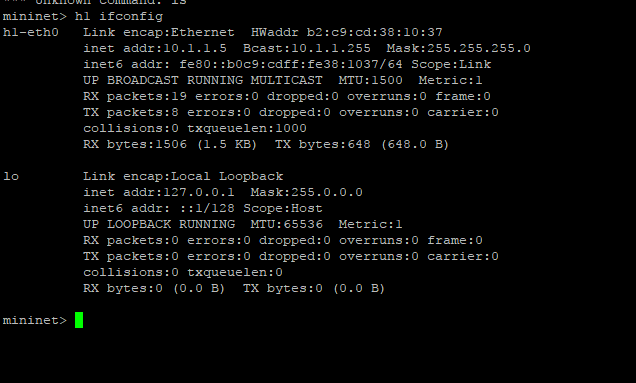
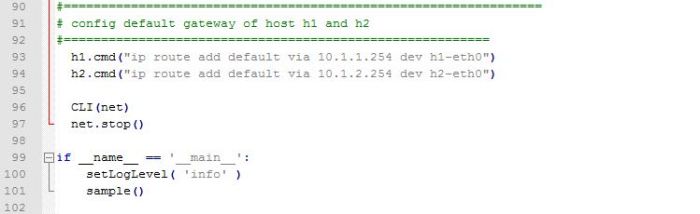
host “h1” gateway

Check the network interface address of host “h2”
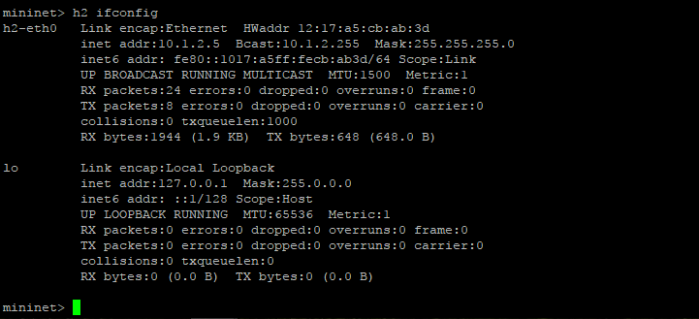
host “h2” gateway

Check Interface “h3” Switch
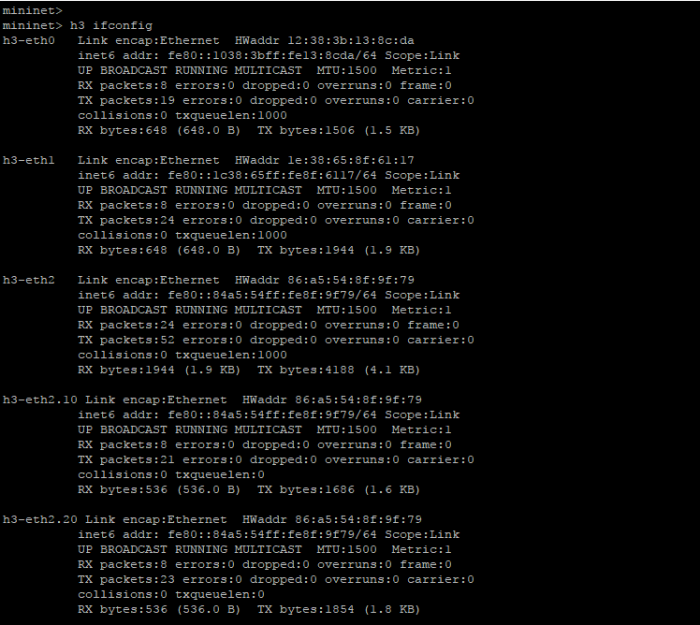
check VLAN of “h3″switch used command
mininet>h3 brctl show
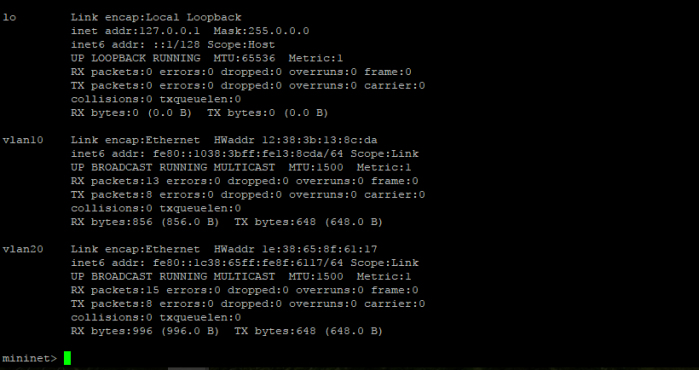
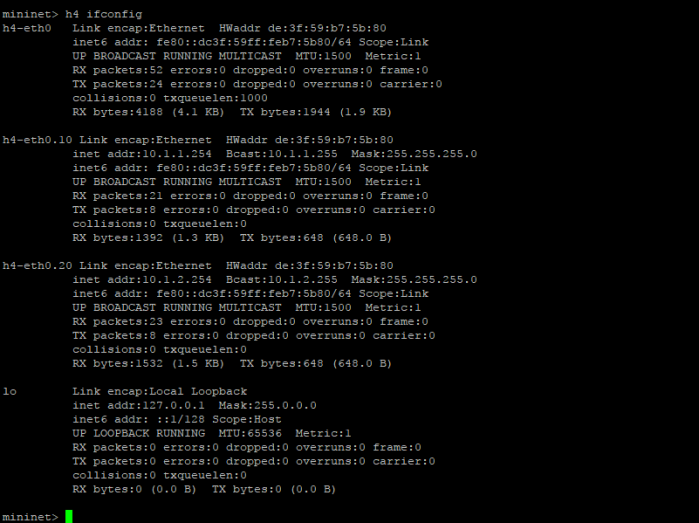
Check “h4” router interface
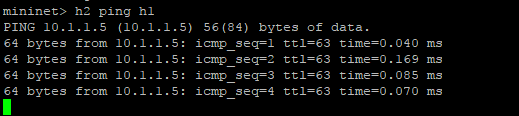
And the last thing, lets we do test ping connection from host “h1” to host “h2” through inter-VLAN network
from host “h1” to host “h2”

from host “h2” to host “h1”
Well, done….hope this article can help you and thanks for read my article
